Doll Dress Boutique Bonus Design

Welcome to the final stop on the Doll Dress Boutique book blog tour!

I’m so glad you stopped by. Doll Dress Boutique is all about great fitting patterns and teaching seamstresses how to mix and match design elements, empowering readers to be the designer!
Don’t worry the full size patterns are included for tracing or use the link provided in the book to download and print the patterns -patterns for classic designs, as well as special designs like sweetheart necklines, pintucks, and princess seams. It also has specialty skirts and 9 different sleeve patterns. There’s even a dress with a diagonally pieced bodice with ruffles sewn into the seams:

This next one is the Orange Crush bonus design from the princess seamed dress chapter. The back is slightly scooped giving it a wonderfully unique look.

This cute bonus design from the square neck dress chapter illustrates how to use rick rack in a different way to create a one of a kind look.

Here are the fancy Party Dresses.

(Right) Tea Party dress has a deep scoop neckline in the back. The other dress shown, Ruffles and Lace, has a “V” shaped back neckline. I used the Tea Party dress bodice (sweetheart neckline in front) to make a bonus design: Dots & Stripes (shown below).

I then added the sleeves from the Blomstring Dress and Orange Crush dress.
Used velvet ribbon to tie the lifted overskirt and left the lace off of the hem of the underskirt, instead hemming the sleeves with lace.

Created a pretty sash from the general sewing chapter, which gave it a nice pop of color.
There are 46 pattern pieces, plus appliqué templates. Over 40 different dresses are shown in the book and no two are the same, but the possibilities are endless. Doll Dress Boutique also includes many special techniques to create lots of pizazz with little details, such as this hand sewing technique to add a ribbon sash.

Here’s a design that I wasn’t able to fit into the book. It’s a Bonus Design I call Perfectly Preppy Dress. I was a teen in the 80’s and preppy was definitely a thing. But as we seamstresses know, styles always come back. Right?

Nothing says preppy more than lime green and pink together. And argyle sweater vests screams preppy! That’s where the inspiration came from. I don’t knit, so I sewed an argyle appliqué sweater vest-dress.

Preppy can be so cute. This dress makes me smile. A lot. I hope you enjoy this design, too.

Materials

White fabric: 1/3 yard
Pink micro floral fabric: large scrap
Lime green polka dot fabric: fat quarter
Solid Pink fabric: 1/8 yard
Hook and loop tape: 1/8 yard
1/4″ wide elastic: 1/4 yard
Sulky®12 weight cotton thread (navy)
Topstitch machine needle
Fusible web
Sulky® tear away stabilizer
Cutting Instructions
Patterns: Bodice Front 13, Bodice Back 14, Sleeve 32, and Collar 15
Skirt piece: 6″ x 31″
Hem binding: 1 1/2″ x 31″
Appliqués:
Lime green polka dot fabric: 1 3/4″ x 11″ and 1 3/4″ x 2 1/2″
Light pink floral fabric:
2 1/4″ square
1 3/4″ x 11″
Fusible web:
1 1/2″ x 10 1/2″ (2)
1 1/2″ x 3″
2″ square
Sewing Instructions
Appliqués
- Fuse the fusible web onto the wrong side of the green and pink fabrics.

2. Cut strips of green fabric 1″ wide from both pieces, then cut into 1″ segments for 1″ squares. Cut 12.

3. Repeat step 2 for the longer pink strip. Cut 10.
4. Cut a 1 1/2″ square from the smaller pink strip of pink fabric.
Bodice
- Peel off the paper backing on the large pink and 2 green square appliqués and position them on point and centered on the bodice front. The lower corner of the pink square should be 5/8″ up from the lower raw edge and the green points 1″ up from the raw edge, with the pink square on top of both green squares on the sides.

- Fuse the appliqués in place by pressing straight down and not shifting them. If you press straight down and straight up when lifting the iron, adhesive backs will keep them in place before they are fused.
- Allow to cool and stitch them in place very close to the raw edges, placing tear away stabilizer on the wrong side and using a short stitch length.

Tip:
To make the stitching more attractive, do not back stitch. Instead leave all the threads long. After removing the tear away stabilizer, pull on the bobbin thread of each end point. This will pull the needle thread to the wrong side (creates a loop). Continue to pull the needle thread to the back and tie the 2 threads together into a knot.

4. Using the 12 weight Sulky® cotton thread in the needle and regular thread in the bobbin of your machine, sew a zigzag pattern across the appliqués.
This Sulky® thread is amazing! It’s a perfect weight to give the design an extra boost of creativity without having to hand sew. It sewed effortlessly in my machine and absolutely love the results. The link to exact color I used is in the materials list.

Use tape or a post it note to keep your stitching straight!

5. Sew the other zig zag stitching line.

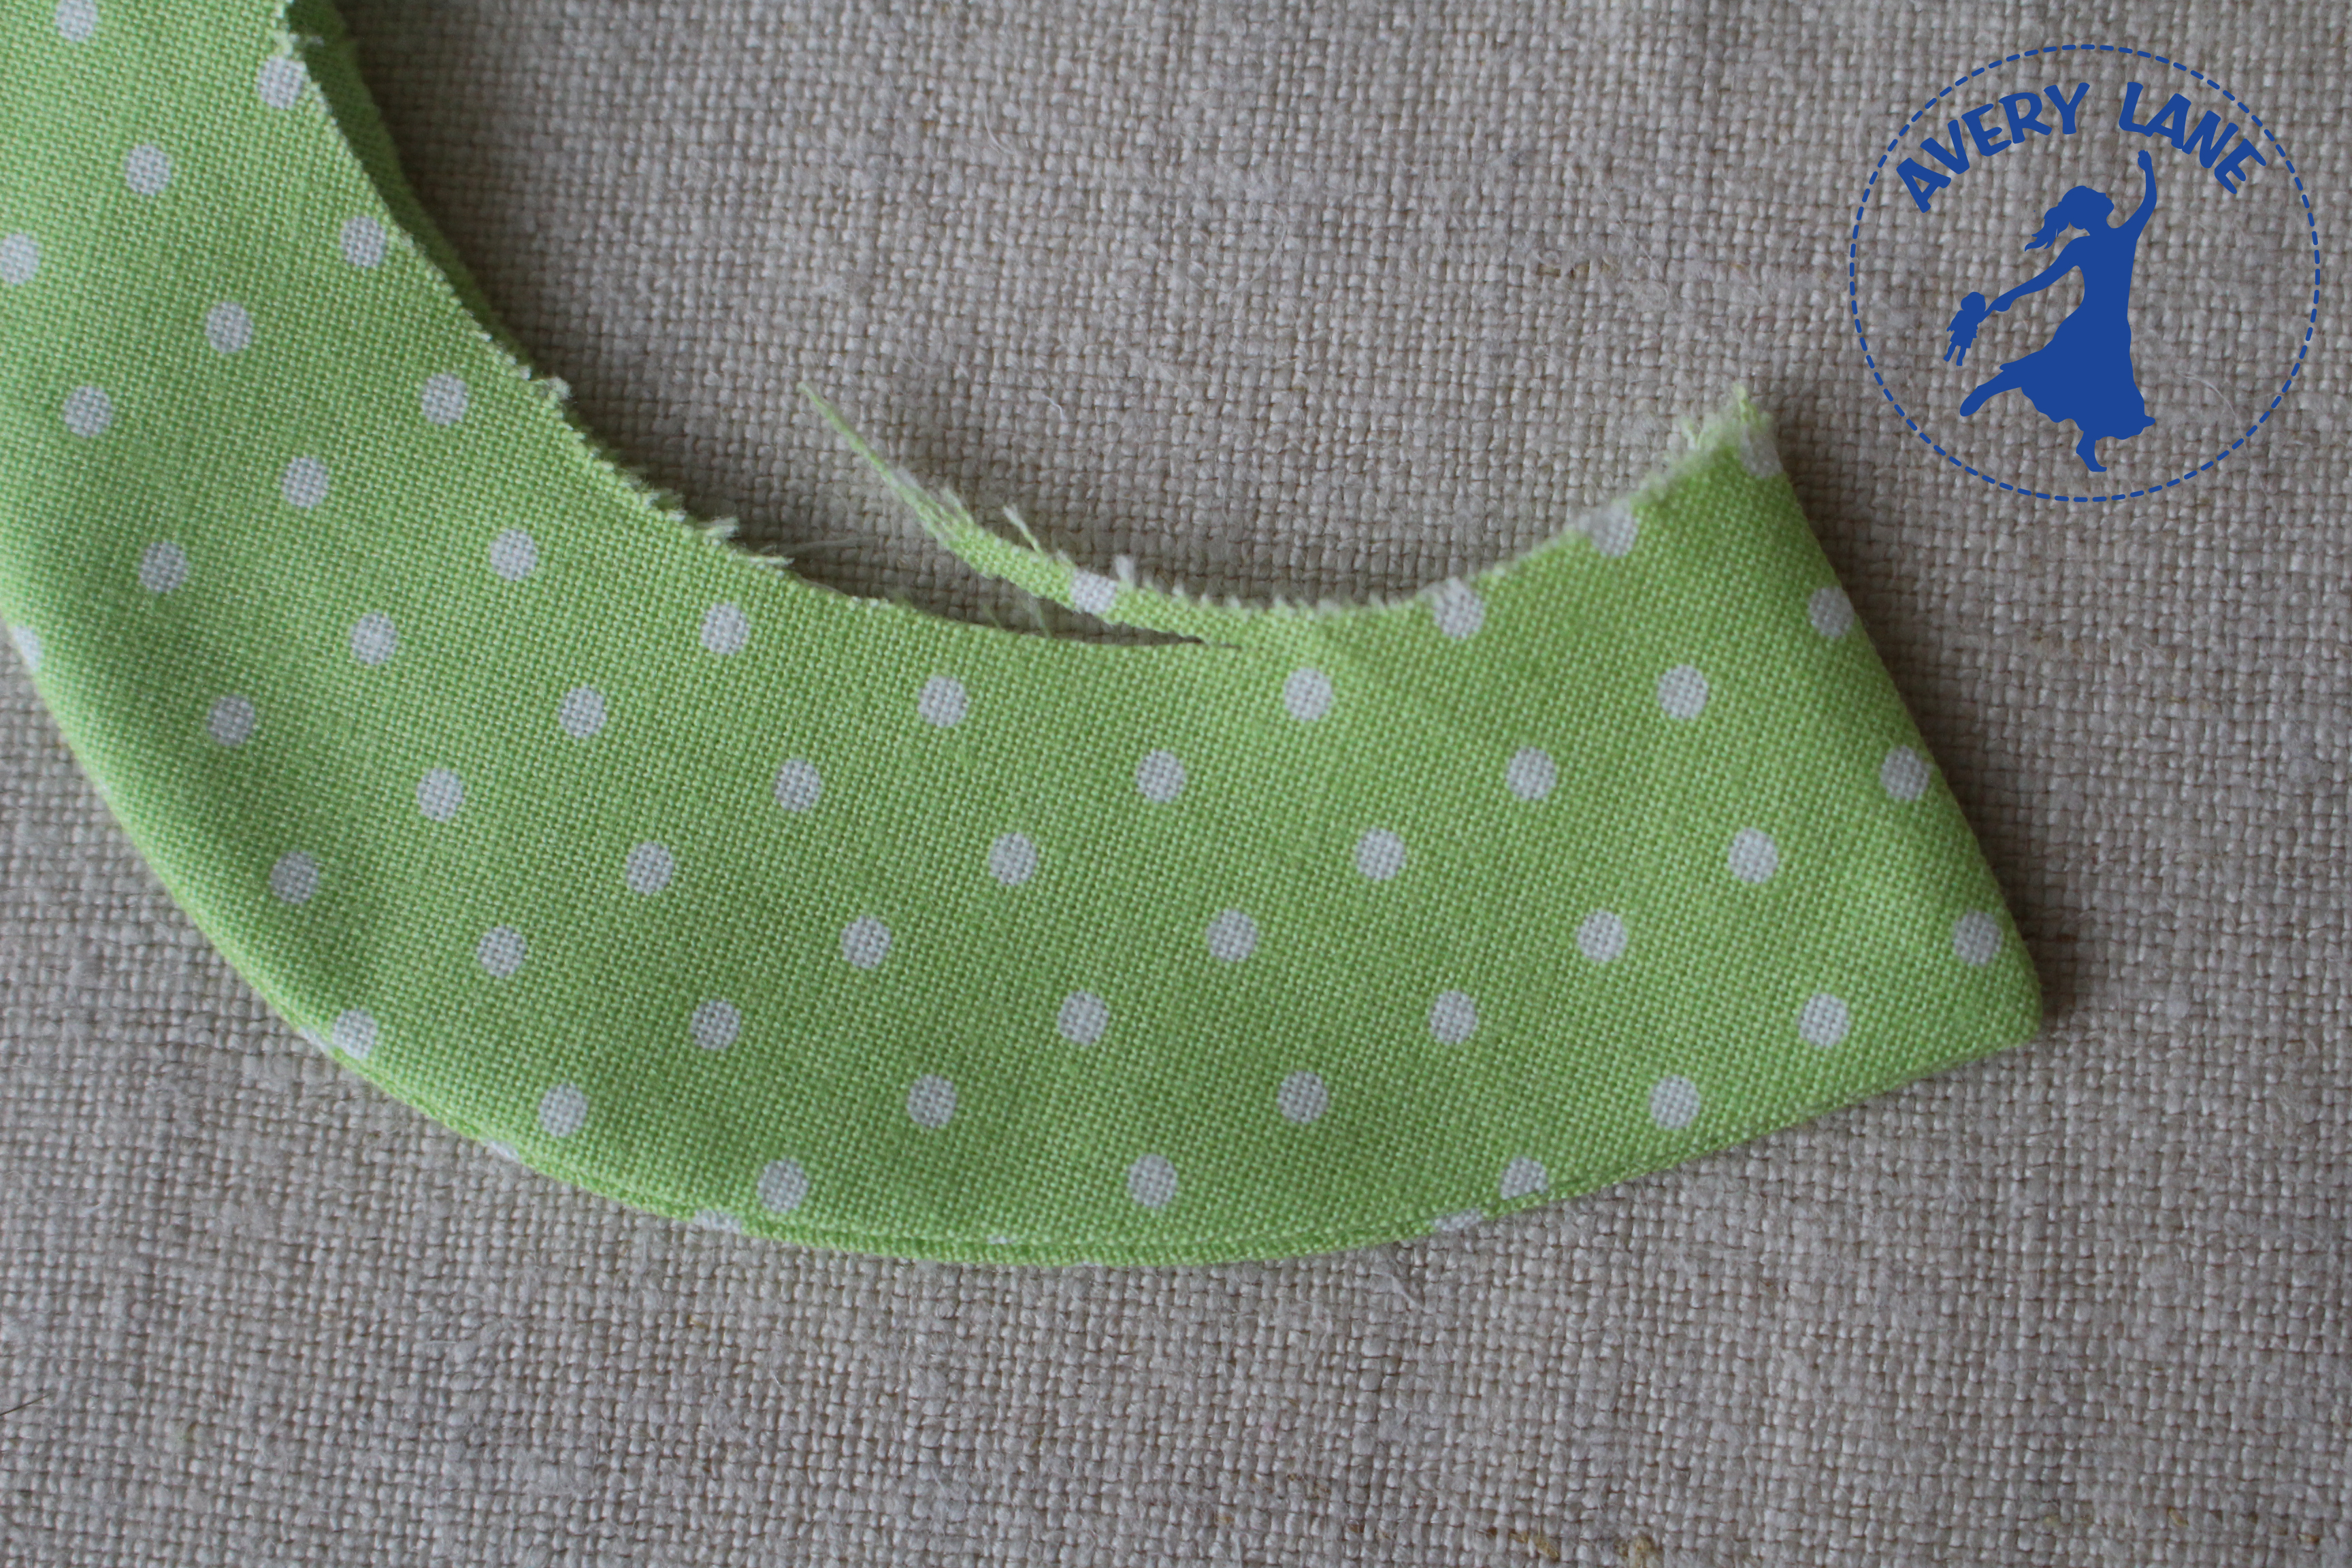
6. Sew the collar according to the instructions on page 17.
Collar Tips:
There are many techniques to creating sharp corners, such as sewing off the end in each direction instead of sewing a pivot. Another technique is to take a diagonal stitch (just 1) at the corner instead of pivoting. I have not found these to make a huge difference, but you might want to play around with them and see if you like the results.
Below are the things I do to make my collars more professional-looking. I always regret it when I don’t take the extra few minutes to do these steps. It’s the details that can take a design to the next level. [click on these photos to make them bigger]
- Instead of using pinking shears, trim the seam allowances almost to the stitching line. There is a risk involved: cutting too close and creating a hole, so be careful and experiment to see what works best for you.
- Place your finger on the corner point and hold the seam allowances folded to one side as you turn the collar right side out. This will get the corner almost completely sharp.
- Use a corner turning tool for the corners. Nudge and work the corner carefully until it has a nice point.
- For the rounded edge, use the iron to press inside the collar, before pressing the right side of the fabric, to press the seam allowance to one side. This encourages a nice curve and prevents unwanted folds within the seam allowance.
- Press the edge seam slightly to one side, to the side that will be touching the bodice. Trim away the raw edge, so the raw edges are together and even again. When pinning the collar to the bodice, keep all the raw edges even.

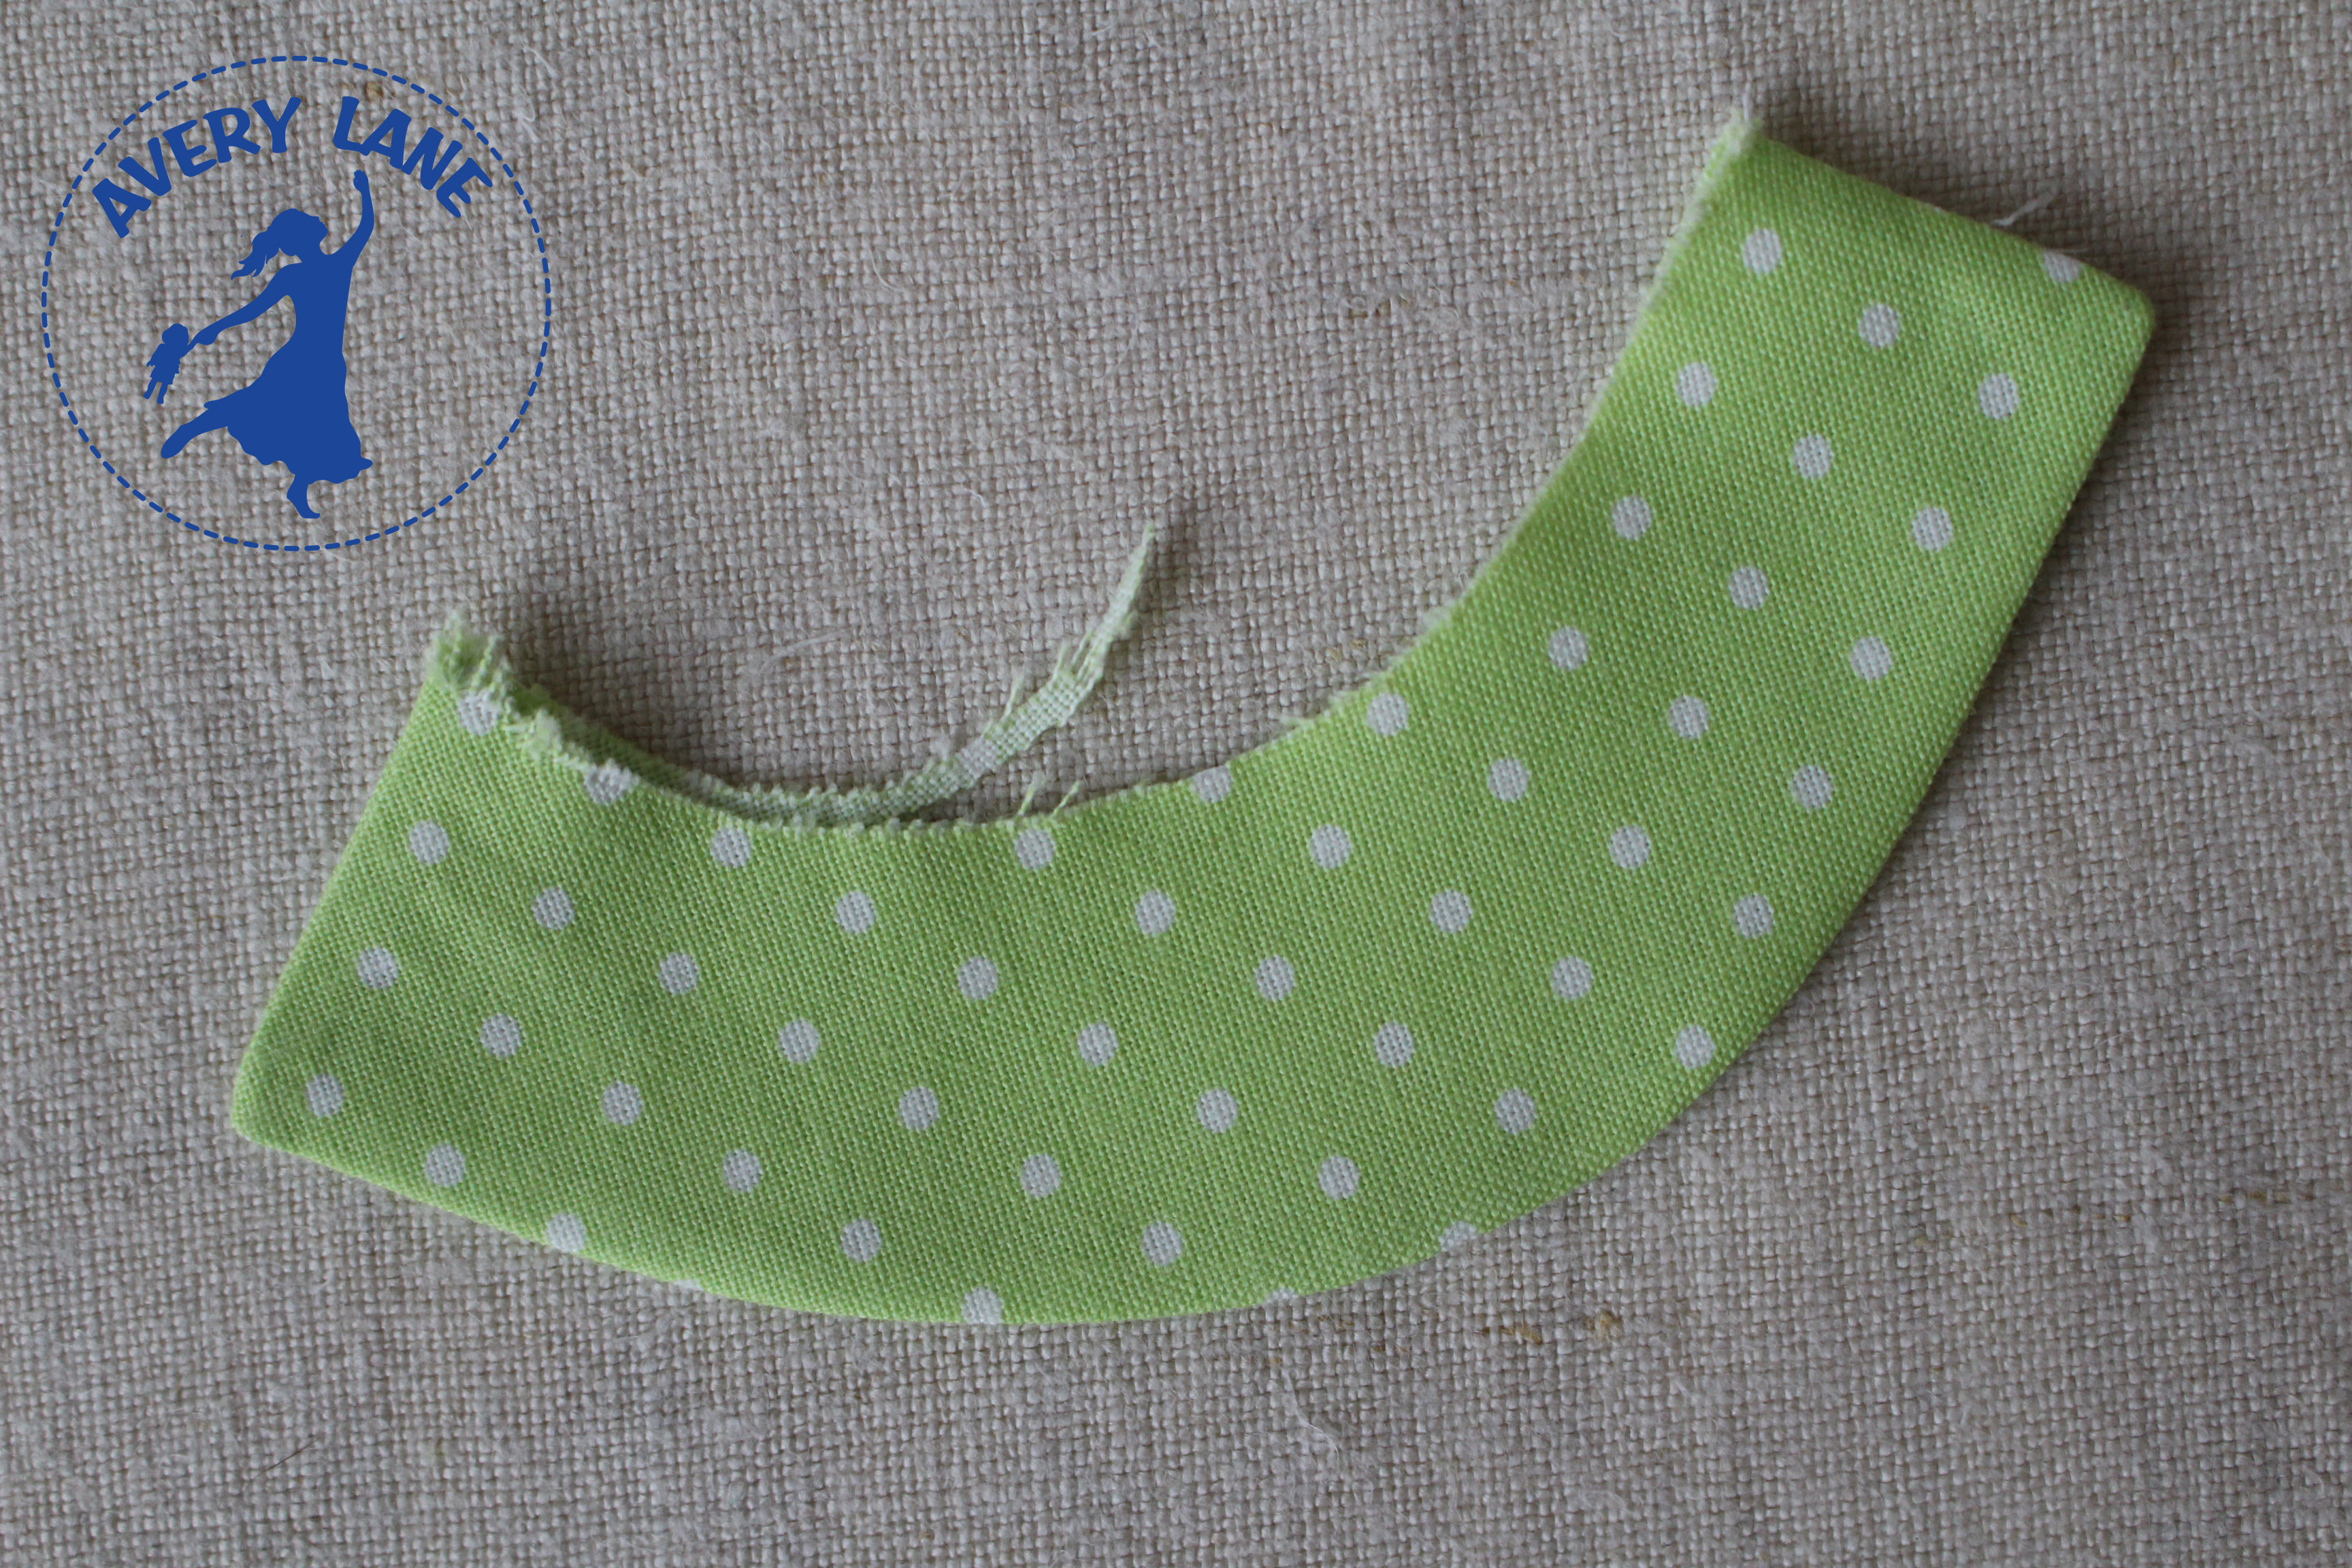
Wrong side view with seam pressed slightly to one side-this side will be facing the right side of the bodice (the underside when finished). 
Right side view-this side of the collar will be visible when finished– no seam is showing on the curved edge. - On the right side of the turned collar, use the nose of the iron to push out the curve in any spot that isn’t a nice curve.
- Overlap the center point by the seam allowance amount, so the collar pieces start to separate at the seam allowance line, which 1/4″ on this doll dress.

7. Follow the instructions on page 9–10 for a lined bodice with sleeves.
8. Sew casings on the sleeves and sew the sleeves to the bodice according to the instructions on page 13. Add 4″ of elastic to each sleeve casing after the sleeve has been sewn to the bodice.
9. Sew the side seams and finish the seam allowances.
Skirt
1. Follow the instructions for the appliqués on the bodice for adding the appliqué design to the skirt piece, placing the points 3/4″ from the lower edge and starting 1″ from the center back edge.

2. Mark picot points onto the skirt piece, 1/2″ from the edges of the squares, by placing a clear ruler at the point where two squares meet as shown. Mark pivot point on the top and bottom of the rows of squares.
3. Using the 12 weight Sulky thread in the needle and regular thread in the bobbin of your machine, sew a zigzag pattern across the appliqués.

4. Repeat for the second row of stitching.
Finishing
Follow the instructions on page 14 for gathering and sewing the skirt to the bodice.
Follow the instructions on page 16 for the back closure.
Follow the instructions on page 11 for sewing the hem with binding.

I hope you enjoyed this tutorial for making a pretty preppy sweater vest-dress for your American Girl Doll. It’s so nice to finally share this design with you all.
Be sure to check out some of the other great tutorials that happened on the blog tour!
Monday, November 12: C&T Publishing
Tuesday, November 13: Jane Wilkes, Janie Caroll Designs
http://www.janiecarrolldesigns.com/
Wednesday, November 14: Kelly, Sulky
Thursday, November 15: Teri, Terifications
Friday, November 16: Julie, Riley Blake Designs
https://imaginewithrileyblake.com/blog/
Monday, November 19: Cherry, Cherry Blossoms Quilting
http://www.cherryblossomsquilting.com/blog/
Tuesday, November 20: Tammy, Tamarinis
Wednesday, November 21: Erin, Avery Lane Sewing