Homemade Holiday: fun with felt

Felt is a great material to use for creating holiday decor or ornaments. It is easy for kids of all ages to work with and looks great, too. I try to have crafts ready for the kids to do in the weeks leading up to Christmas, as I find they want to be involved. I also like the non-commercialism of it. It’s my sneaky way of down playing the “shopping” and “getting” in our society’s modern idea of Christmas.
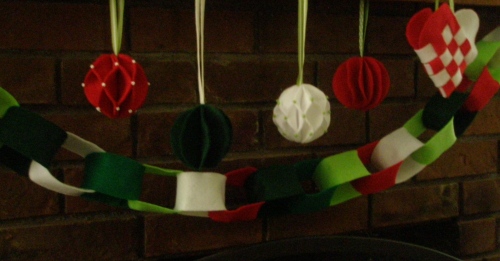
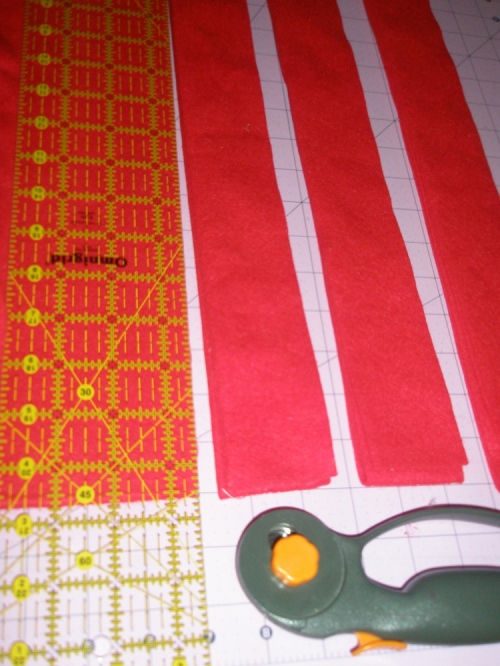
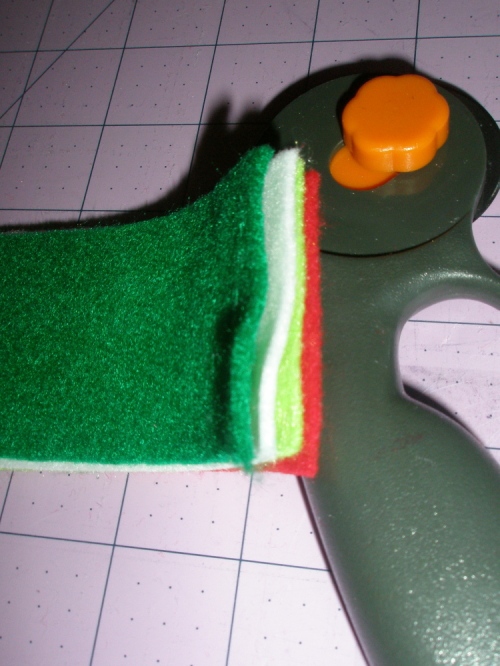
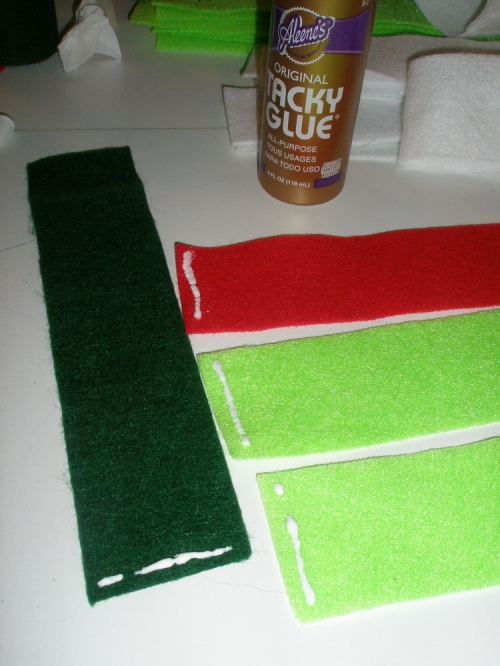
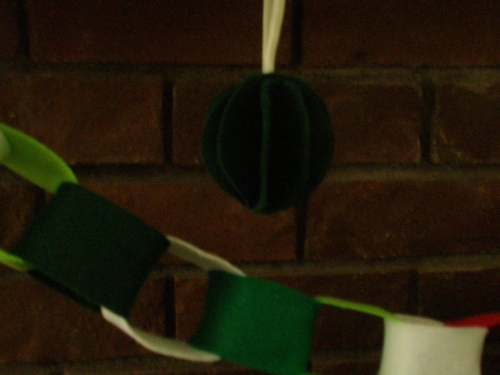
I really wanted to make a felt “paper chain” garland for our mantel. An easy enough project to finish myself, but my kids could add to it or make their own. So I bought some felt and took my rotary cutter to it. I bought the heavy duty kind, so it would hold its shape better. Some colors only came in the thinner kind though.
I started out sewing them decoratively by hand, which is a great activity for kids 🙂
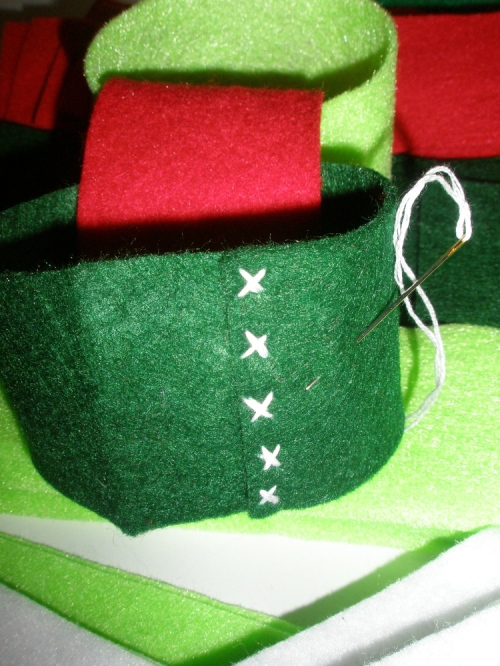
I soon tired of it, so I pulled out the glue. Hot glue would also work 🙂 but kids certainly could do the embroidery work or craft glue independently.
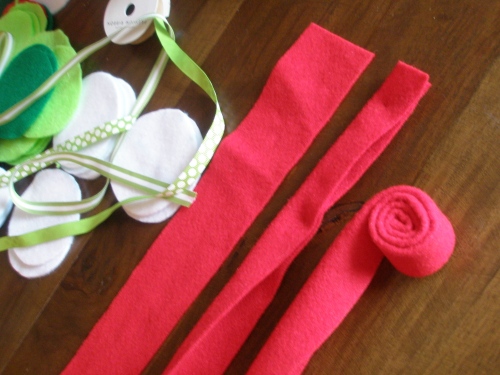
After making a pretty long chain for our mantel, and one for my friend’s mantel, I realized I had a bunch of felt left over. First I made some felt rossets. Hot glued them onto felt, but haven’t decided whether to make them into napkin rings, center piece, or perhaps a wreath.
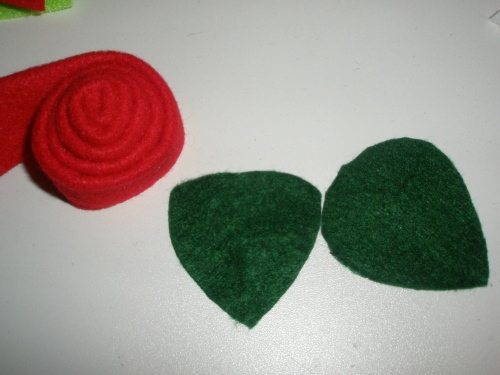
Add some leaves underneath to hide glue.
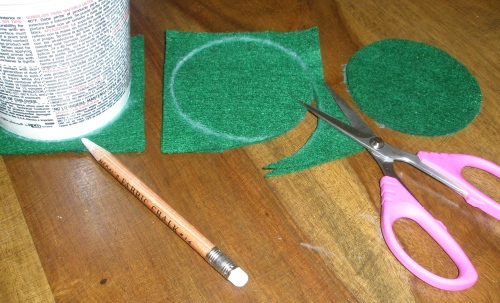
Still have a lot of felt, so I cut some 3 1/2 inch strips, and then cut them into 3 1/2 inch squares.
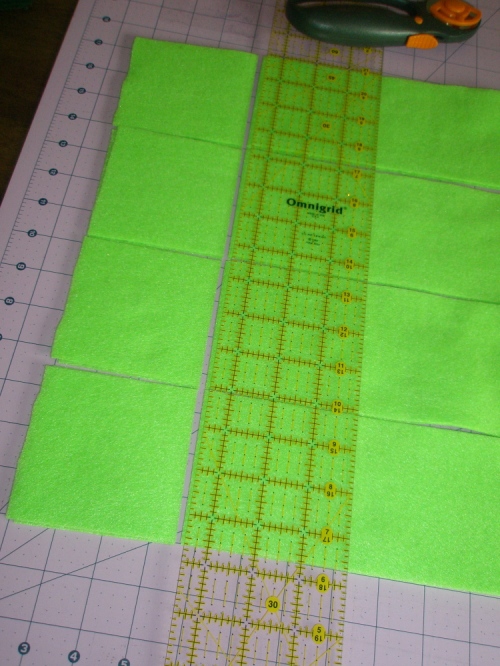
With these, I made a bunch of 3 inch circles.
Now there are many things one can do with a circle of felt…I’m just going to share a couple. The first is ridiculously easy–inspiration came from Land of Nod. I was inspired not to spend $30 plus shipping for a garland of these. Works best if hand stitched and the thicker felt works best on these. The thin stuff looked awful with this particular project. Again, this is a great one for kids. To make each, you’ll use 6 felt circles, thread, needle, and a piece of ribbon (or yarn).
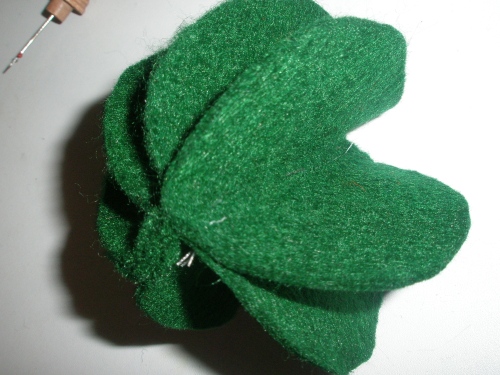
Start with 2 circles of felt. Sew them together straight down the middle. Fold top circle on top of itself and place a third circle on top. Sew down the middle, attaching it to the lowest circle that is unfolded. Clear as mud?
Repeat this process, so you have another set of 3. The sew them together.
I plan to have my kids make a whole lot of these and sew them together to make a garland. To make a garland, sew them together through the very centers. To make single ornaments, as shown, I attached ribbon to the top of the center circles. And of course, I forgot to take a picture of that step.
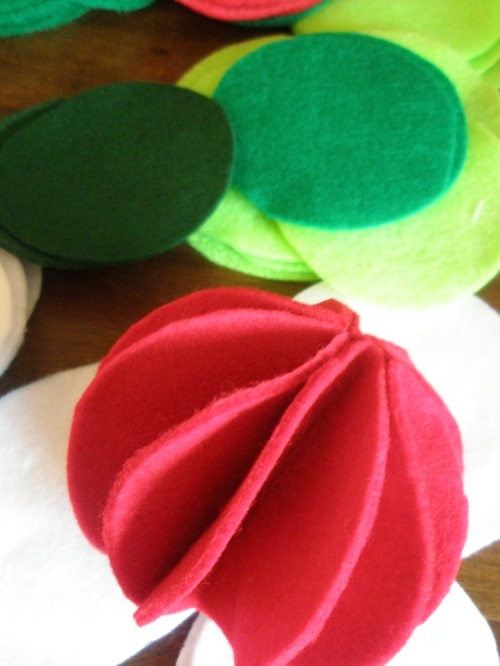
Next up, with those handy circles already cut, I made these lattice spheres. These are a bit more time consuming, and better for older kids. For each lattice sphere, you’ll need:
6 or 8 3 inch thick felt circles (or 3.5 inch circles, or even 4 inch circles would do)
matching thread and needle
9 -12 inch piece of ribbon
18 beads for a sphere made with 6 felt circles, or 24 beads for a sphere made with 8 felt circles
If you like your crafts precise, then you may want to mark the center sewing line, as well as the points at which you will be sewing the beads on. Here is a photo to illustrate how you might do this.
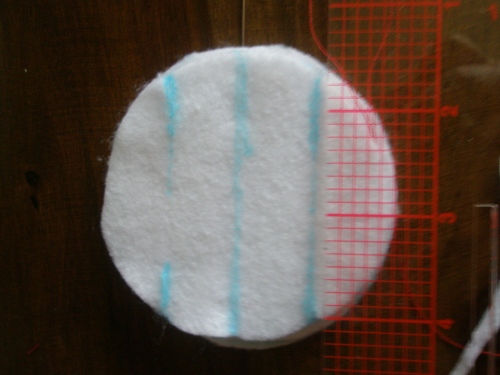
Step 1 stack the felt circles and sew them together down the center.
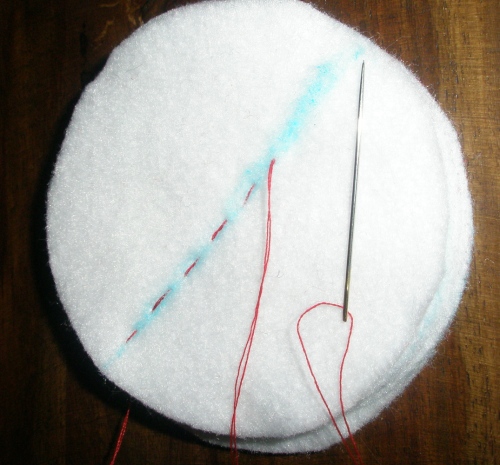
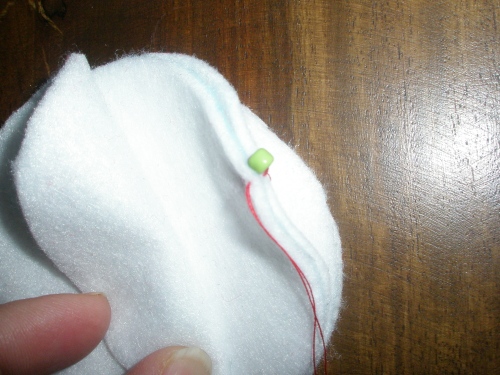
General: to sew beads on, begin by pulling needle through the two pieces of felt being sewn and first sew the felt together, then sew the bead on. This conceals the knot at the end of your thread in between the felt. Secure your thread by sewing an “x” before sewing the bead in place. End your stitching, by pulling needle through the middle of the 2 pieces of felt (to hide the knot).
For these steps I used pin and multi-colored felt circles to illustrate how it all works to create this look.Here’s the pattern:
Step 2: Sew the top felt circle together in the equator of your sphere (center).

Next sew the top circle to the one under it, this time in 2 places, closer to the north and south poles of your sphere. (3 red pins and 1 yellow pin)
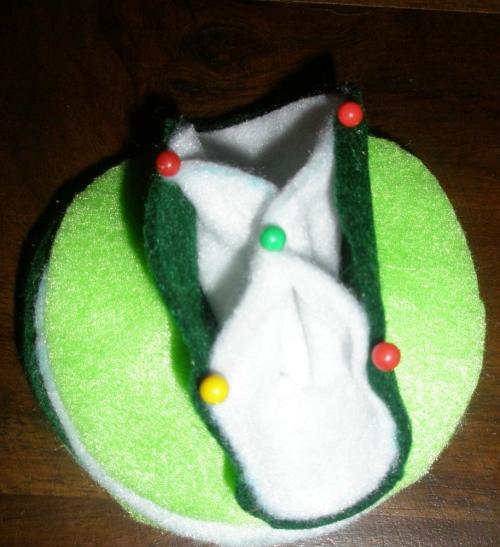
Next sew the 2nd to third layer of felt circles– this time adding one bead at the equator. (blue pins)
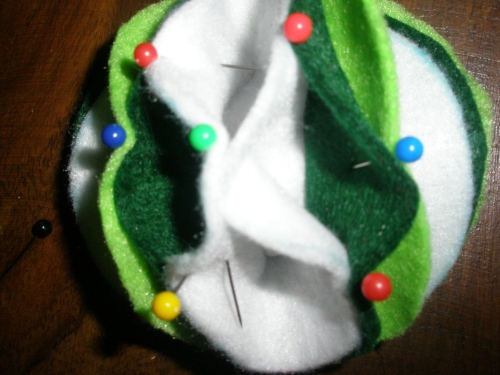
Continue around your sphere, until all layers have been sewn together and have beads at the intersections.
Here is a close-up picture of sewing on of the beads.
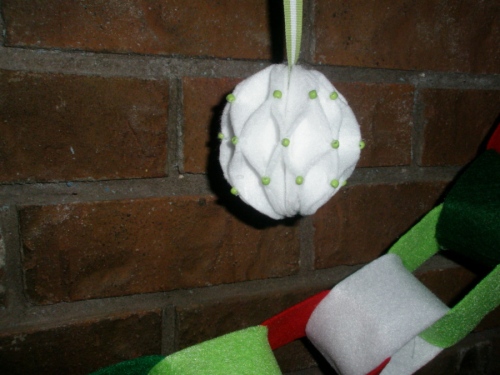
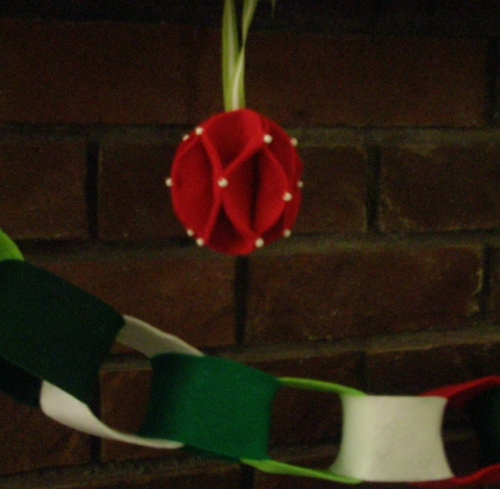
Step 3: attach a ribbon to top, by folding ribbon in half, and sewing folded end in between the center 2 felt circles. Tie into a bow at top and hang it up!
Ta da!
This last ornament is a tradition of ours. We’ve been making them, mostly the kids, ever since my children were preschoolers. It comes from Sweden, I believe. We had Swedish neighbors who shared this tradition and paper craft with us back then. The tradition is to make them out of paper and ribbon, hang them on the tree on Christmas Eve, and Santa will fill them with sweets during his yearly visit.
This is probably one of their favorite traditions. They recognize which ones they made and collect their treats that Christmas morning. It is also one thing that they are allowed to do before mom and dad get up and have a cup of coffee in hand. They are a bit tricky for very young children to weave, but with patience and help, they’ve always managed.
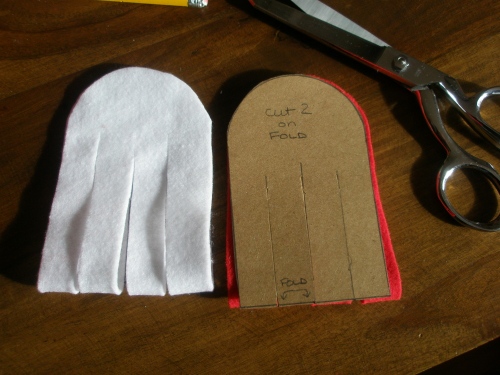
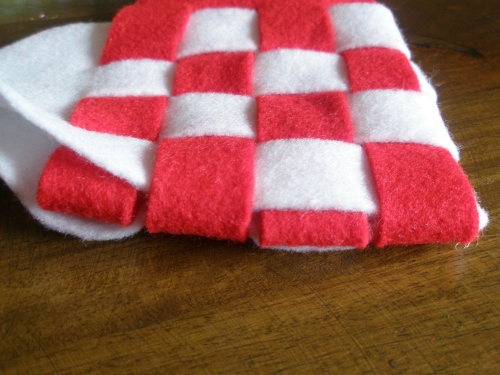
I decided to try making them out of felt this year, and it worked beautifully. I enlarged my template slightly, and cut them out of felt. The weaving went a bit easier than it does with paper.
A template is easy to make. Mine is 3 inches across the bottom (part where it is placed on fold line) and is 3 3/4 inches tall before the curve. To make curves, use a can or jar that is between 3 and 4 inches in diameter. Cutting lines for slits are 2 3/4 inches long and spaced a little under 3/4 of an inch apart.
Begin to weave the folded ends ( make sure to keep them folded exactly in half, for best results). When you weave, you are not going under/ over, but rather inside each other.
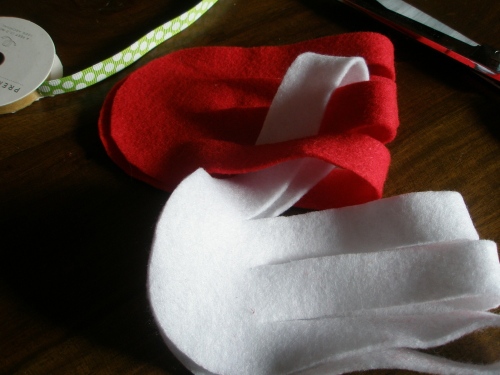
Next strip does the same but starts with the opposite as the one before it.
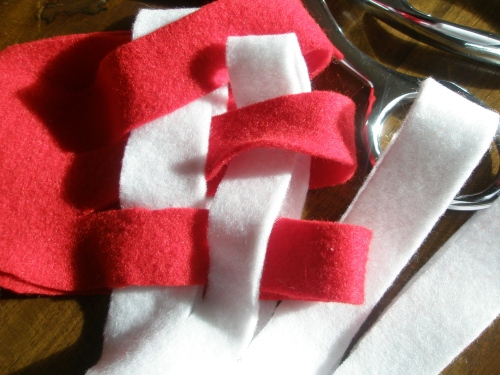
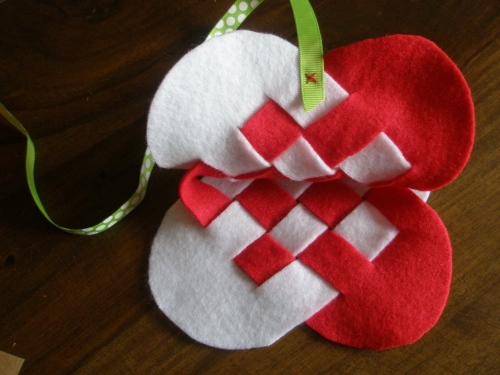
Do this with all four strips, moving the strips up toward the top, to make room for all four slits. Once done, straighten them all out. It should look like this:
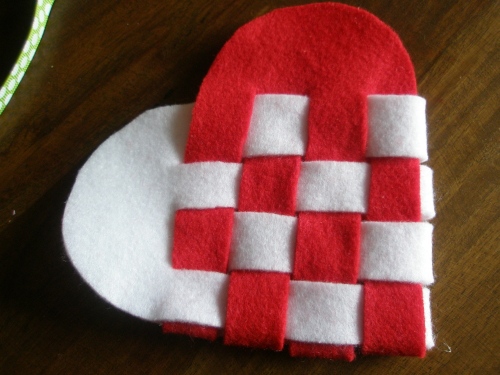
Open up the heart at the top, and hand stitch the ribbon to the top center. Sew an end of the ribbon to each side of heart, so it will hang evenly when filled with treats 🙂
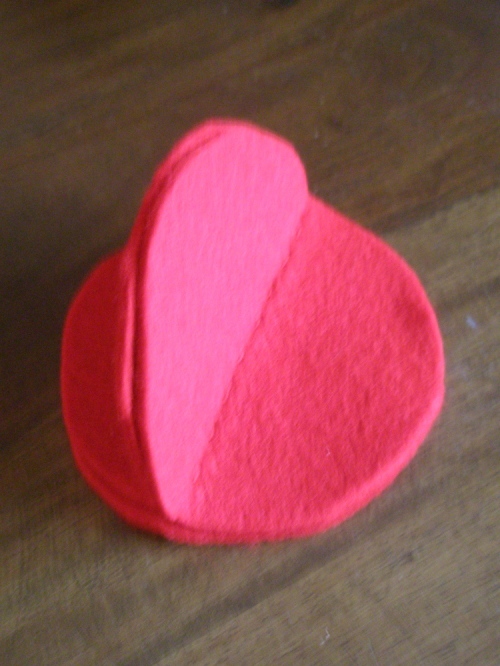
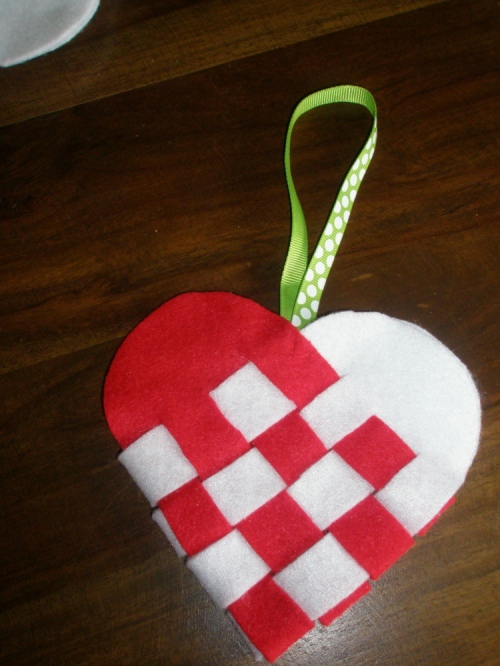
Here is the finished woven heart.
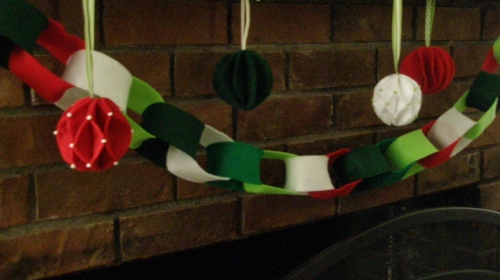
Our mantel is looking extremely festive now. And my kids are interested in making some to hang on the tree as well, especially those Swedish woven hearts. I’m sure it’s not the idea of Santa leaving candy in them. Not at all. They’re just feeling merry.
I hope you’ve enjoyed this post and all its tutorials. I sure had fun creating it.
Wishing for your holiday season to be a peaceful one!