Making an Adjustable Waistband

This sewing tutorial explains how to add buttonhole elastic to a 2 piece waistband in a skirt or pants pattern for an adjustable waistband.


Step 1:
If lining is not interfaced, then add a square of fusible interfacing approximately 2-3 inches from sides. This is to reinforce where your buttons and buttonholes will be placed.

Step 2:
About 2 inches from the sides make buttonholes, placed along the front of the garment. Make sure the buttonholes are centered within the height of the lining and are long enough for buttonhole elastic to easily fit through.
Sew a button next to each button hole. Place the button approximately ½ to 1 inch from buttonhole, making sure that the button is closer to the center front than the buttonhole and not the other way around.

Step 3:
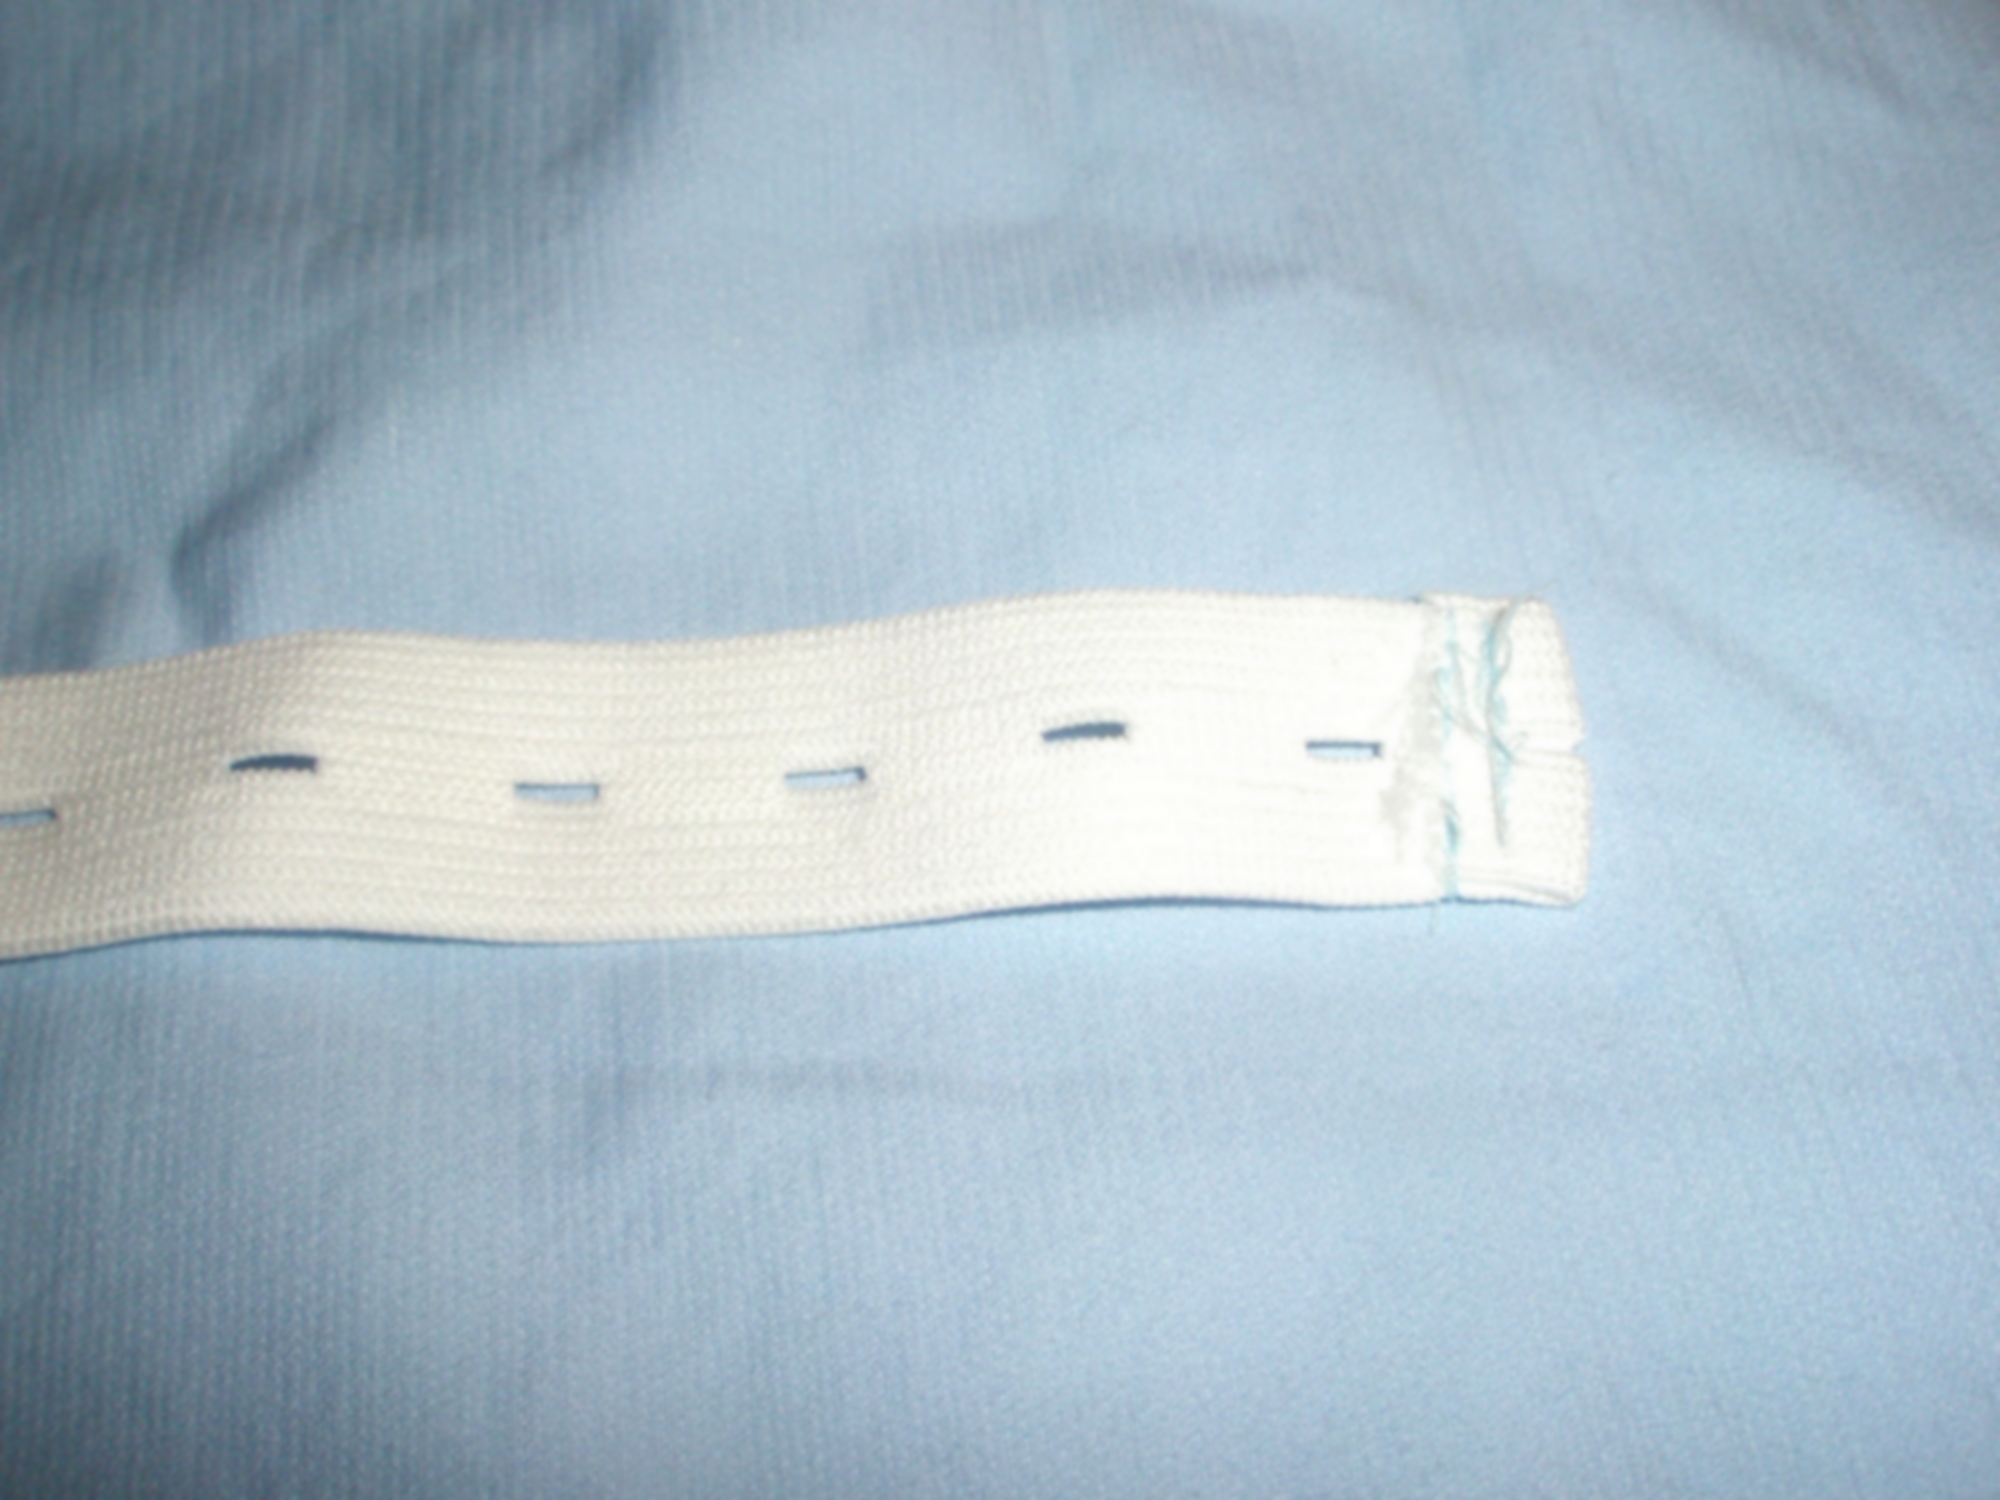
Cut a piece of buttonhole elastic the length of the distance between the buttons, plus ½ inch. Fold under ends of elastic and sew across width.
Step 4:
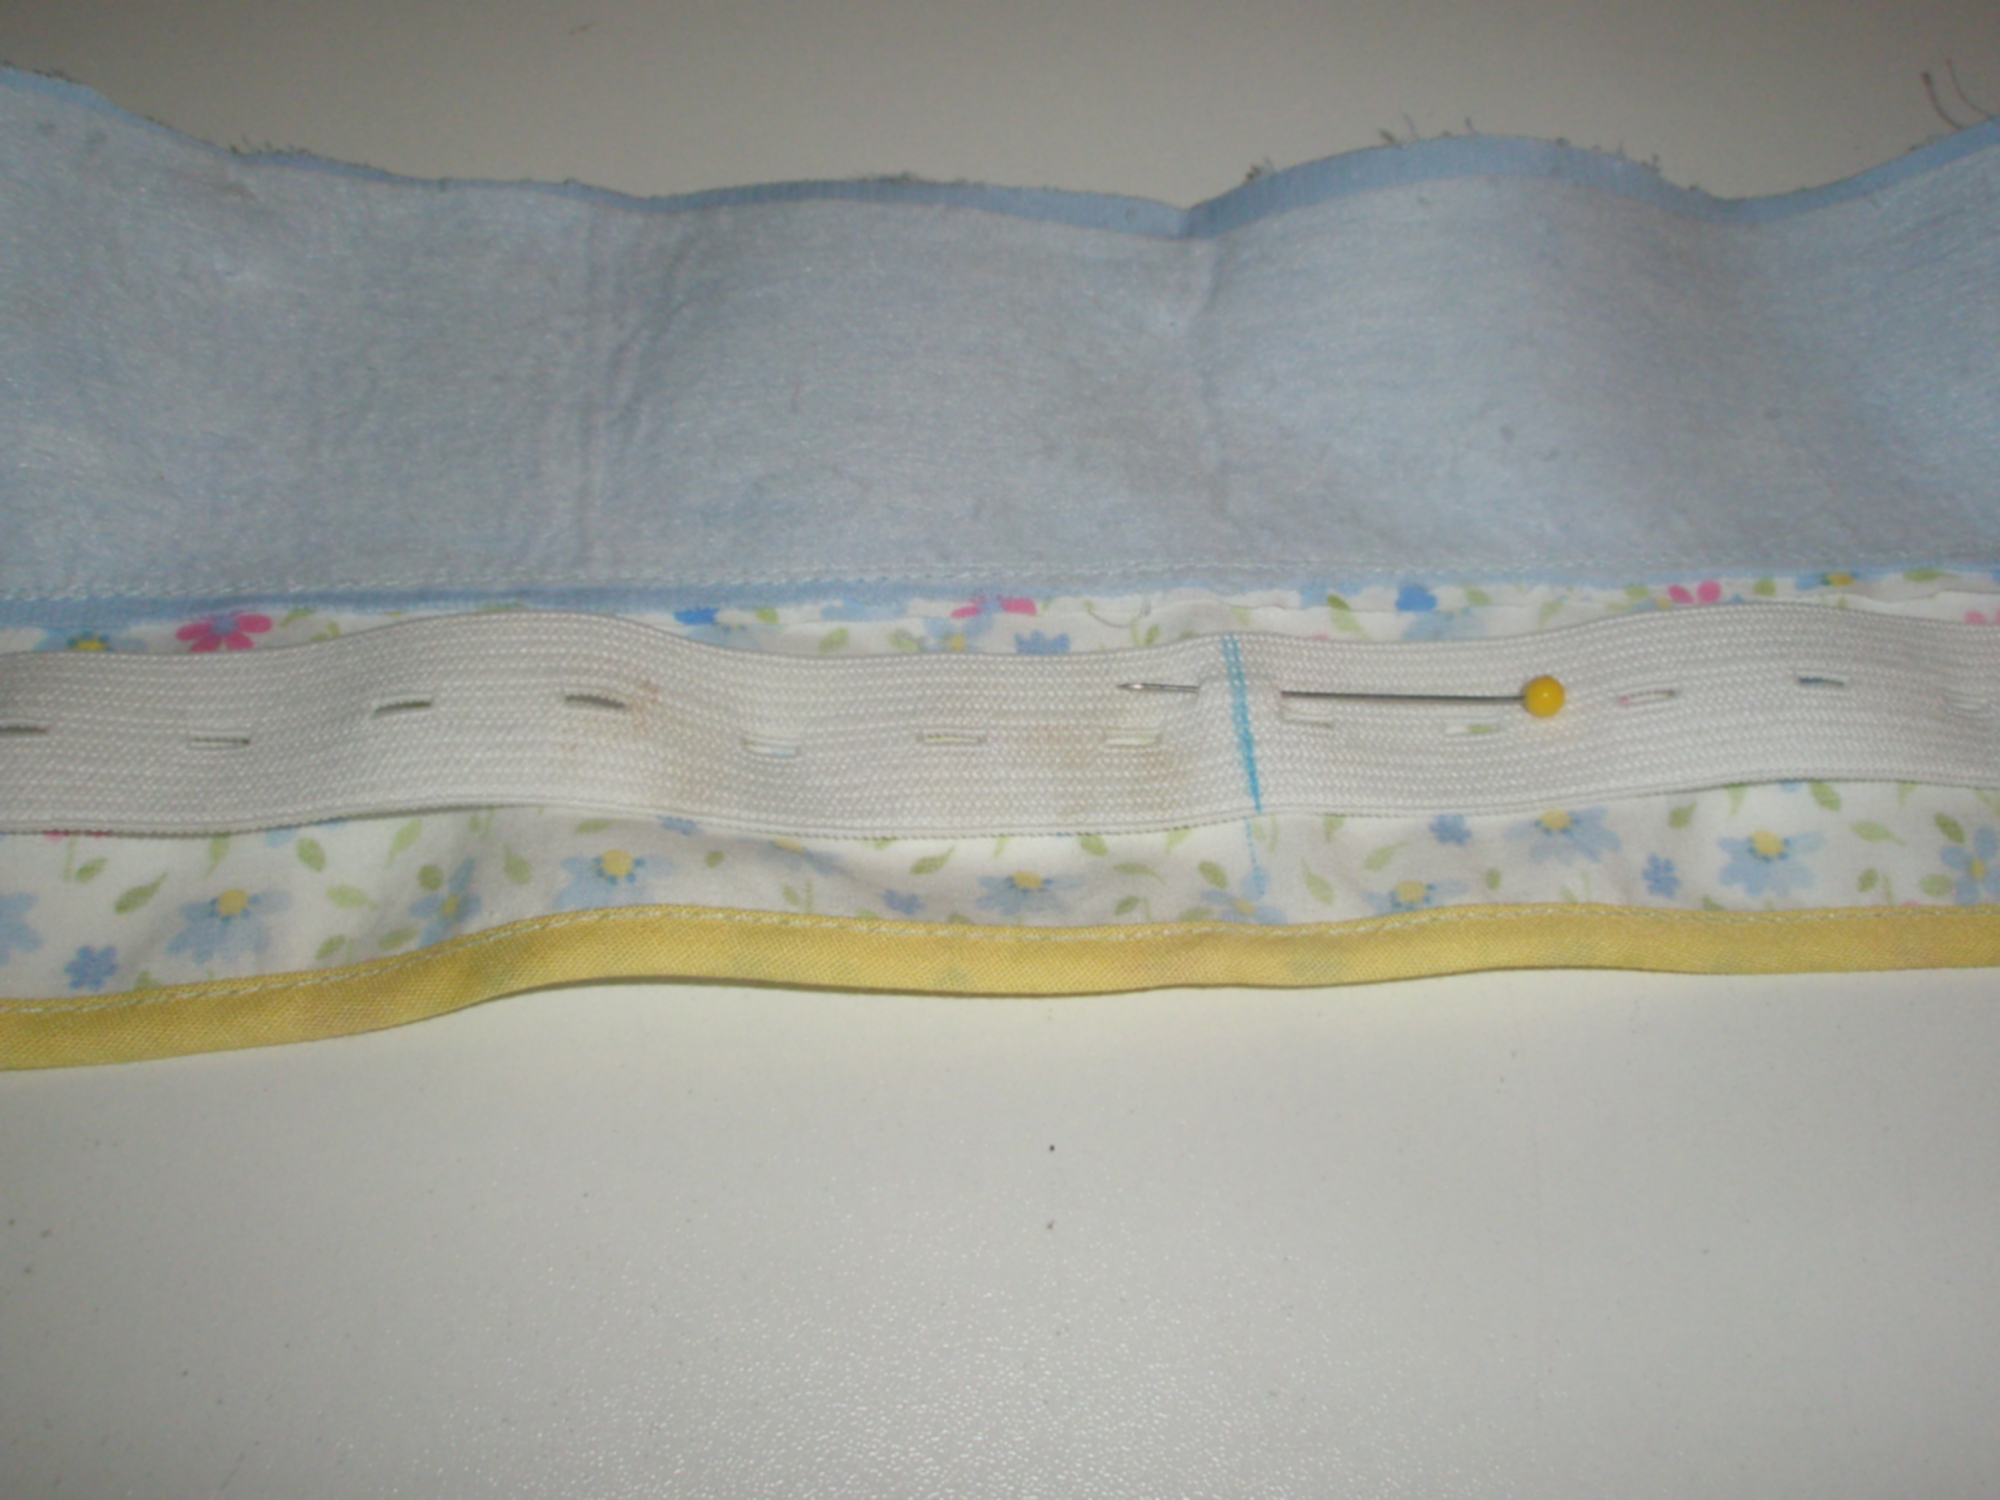
Before sewing waistband closed (onto garment), place the elastic on inside. Pull the ends of elastic out through buttonholes, onto the right side of lining. Pin to secure. Make sure elastic is not twisted and pin at the center back of the waistband. You’ll want to pin it in place instead of buttoning it, so the elastic does not bunch up and make sewing the waistband in place more difficult.

Optional: Sew the elastic to lining, sewing across the width of elastic at the center back to tack the elastic in place and secure it to the waistband lining. I do this, but this is an optional step.
Step 5
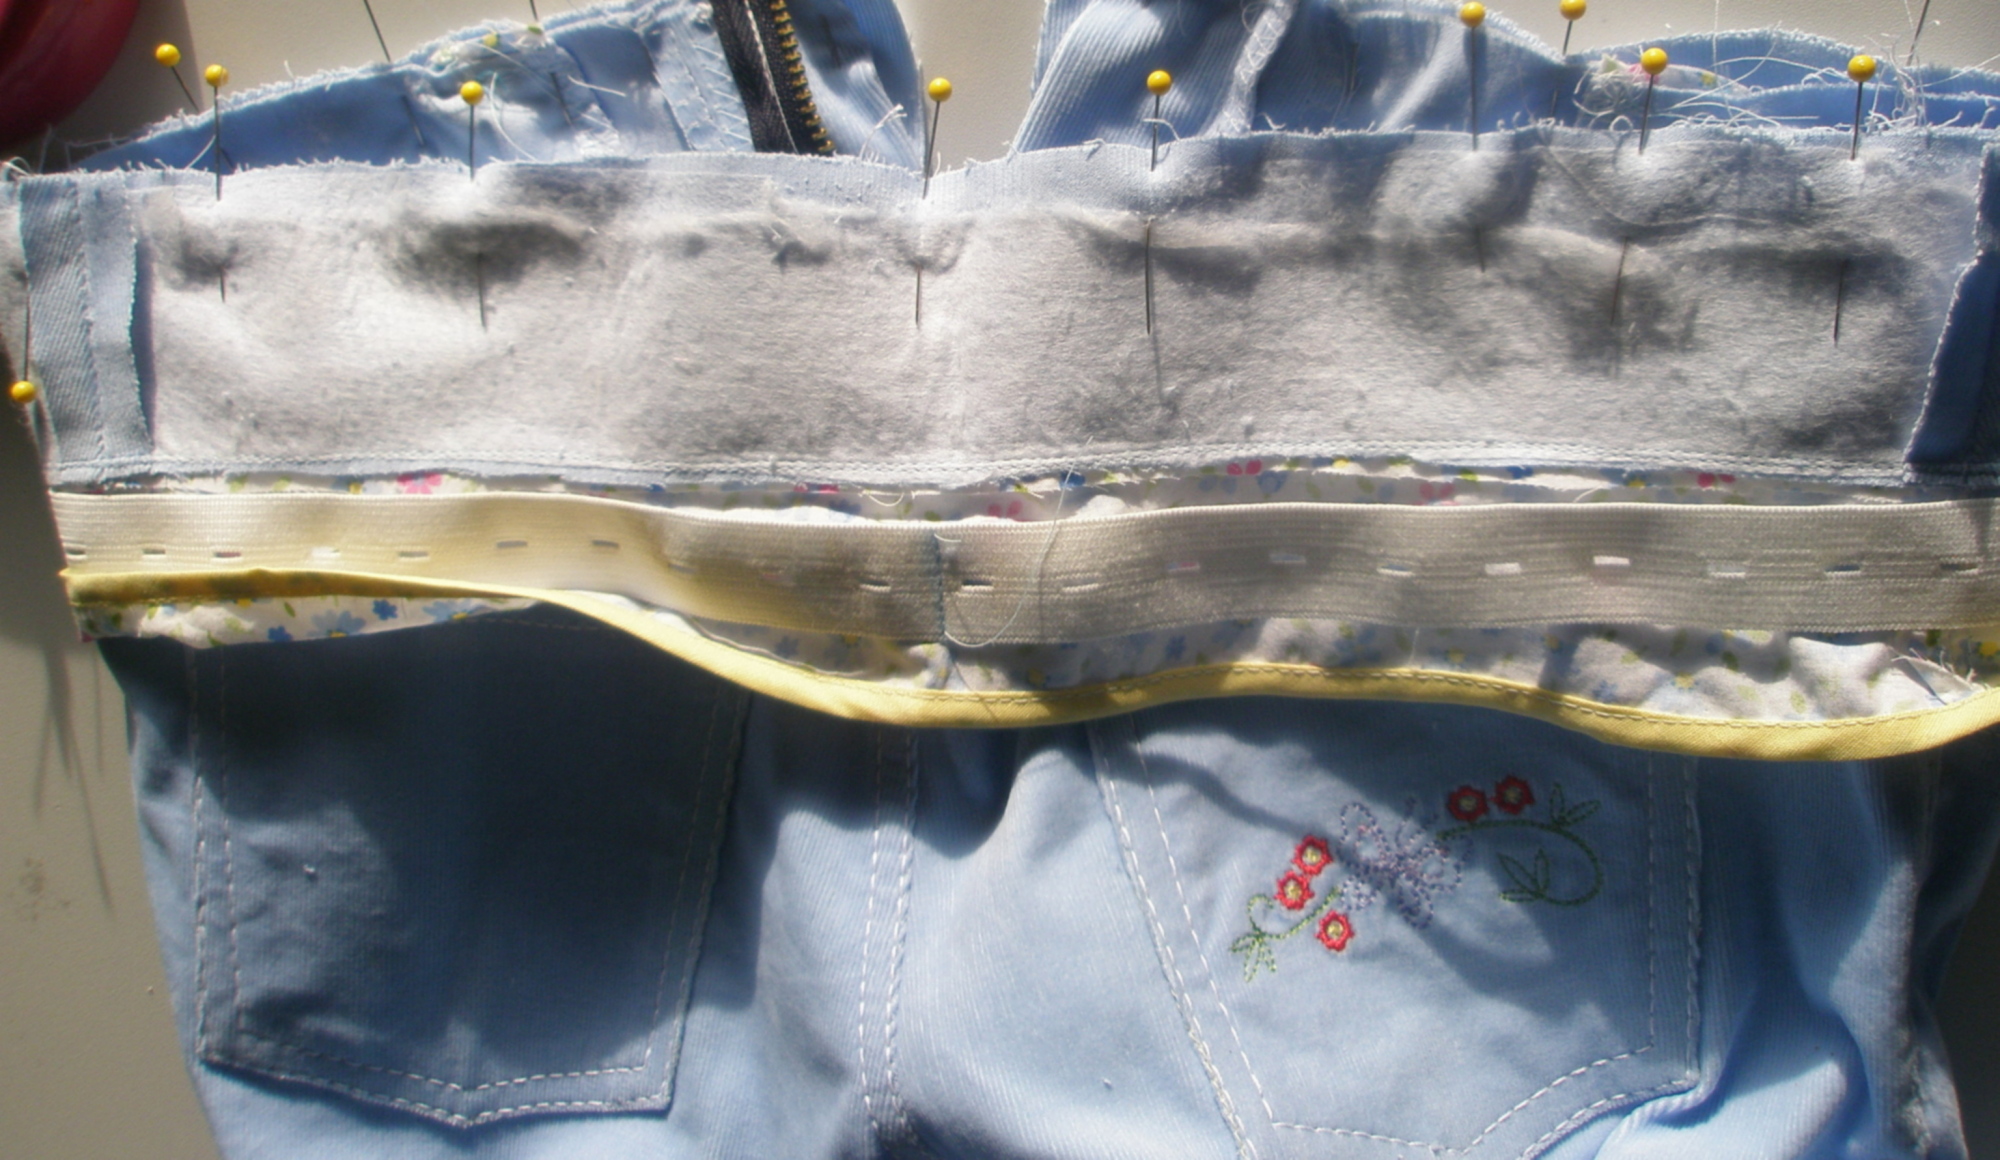
Continue to work waistband as directed by the pattern or as planned. When sewing the waistband closed and in place, make sure to keep the elastic out of the way. You do not want to catch the elastic in your stitches—this would cause you problems. You could baste the elastic in place by hand sewing long running stitches or pin the elastic up and out of the way.
That’s all there is to it 🙂