Making Jeans: Part 2–the back side

Here is where I again venture away from the pattern directions. I find the back side fun to sew up, but it would not be much fun if it didn’t look good, so I do things a bit differently. For the back side, a must is grabbing yourself some of that wonder tape, by Dritz. Oh, and that hammer is going to come in handy, as well. Double check your needle and make sure it is a heavy weight needle, designed for denim fabric 🙂
You can find Part 1 here 🙂 of this jeans sew along.
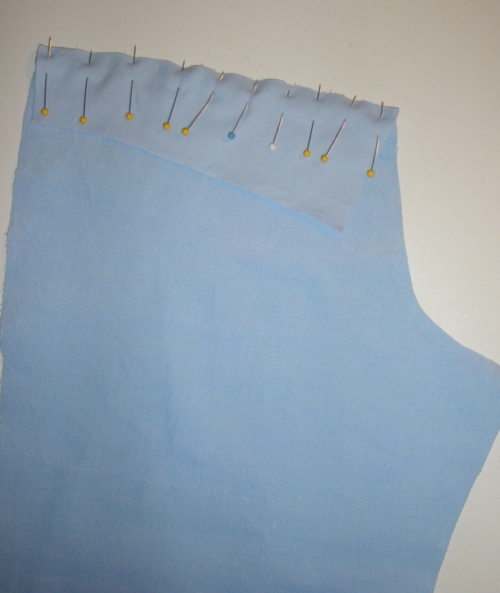
First sew the pant legs to the upper back pieces. Make sure you sew the longer side of upper back pieces to the center backs of the pant leg pieces. Pin and sew right sides together. If you are using a stretch corduroy, as I am, make sure the nap is going the same direction, or they will look a slightly different color when finished.
Serge or finish raw edge of seam allowances. Press seam allowances down away from waist. (this can be done to your preference–I have seen store bought jeans with the seam allowances pressed up toward waist) Top stitch 2 rows along this seam, having one row of stitches close to fold. I use a twin needle, but it gets tricky with that many layers. You may need to increase the upper tension slightly. Practice on the same amount of layers of fabric scraps.
I prefer to add the pockets now. The pattern instructed me to do them before, but I didn’t listen. I want them to be centered and placed in alignment with the top stitching I just did. So I waited. If you are really naughty, you can add them after doing the center back seam.
For the back pockets (an important design element to this project), I have done them several ways before decided which methods work. Against my better judgment, I even used a glue stick on one pocket (never again).
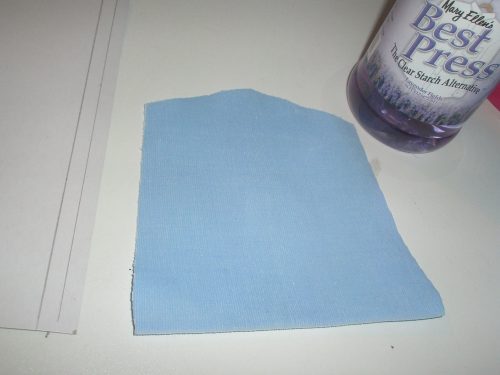
One method that I really like is to cut out a card stock pocket, trace your pocket shape pattern piece without seam allowances. Only one and place it on the pocket piece, on the wrong side of fabric. (spraying the fabric with starch helps loads) Fold the seam allowances onto the the card stock and press. Remove the card stock, add that fabulous wonder tape to the seam allowances and press them in place.
You can see on my card stock, I also included seam allowances, so I could make sure it was centered properly. Best Press is great for pressing seam allowances in place. It’s usually available at quilt shops.
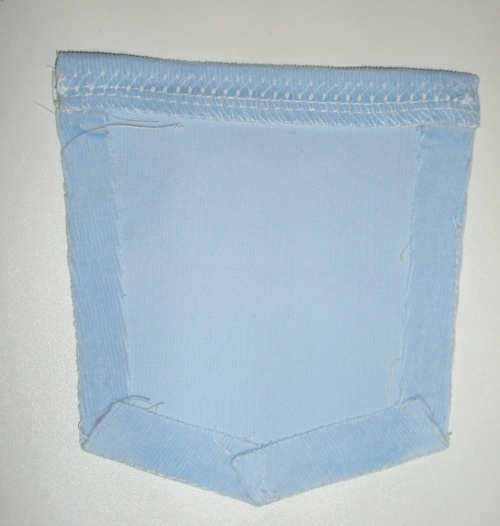
The other pocket construction method that I like very much is to sew basting stitches along the pocket, on sides, and lower edges, right where you will be folding and pressing. The stitches help you to fold accurately, pressing those stitches right on the fold. You must sew your basting stitches accurately for this method to work well. I like this method a lot 🙂 Let me know if anyone would like a pocket photo tutorial and I’ll make one. The pictures for this did not come out clear enough to include. Sorry.
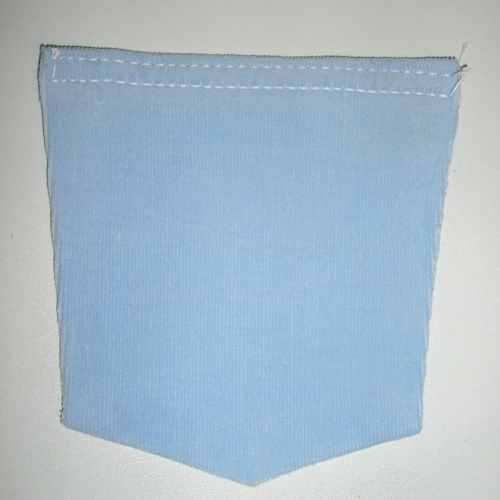
For both methods, you’ll need to finish the upper raw edge of the pocket. With the upper edge folded down, according to its seam allowance, and right sides together, sew the sides of just the folded upper edge. Clip corner and turn right side out and press in place; continue pressing sides to match the folded part. Sew upper edge closed.
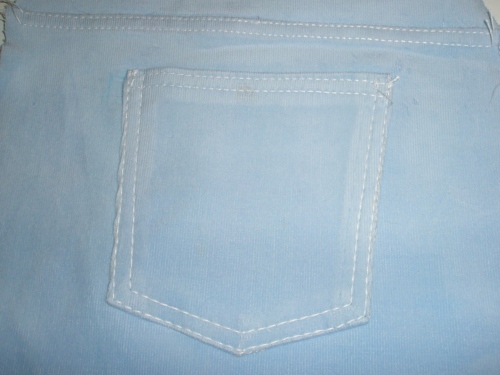
Fold and press you preferred method, and place wonder tape to hold the seam allowances there. If you look closely, you can see my basting stitches along the fold lines of my pocket.
At this point, I check to see how close the pockets are to being exactly the same. Any adjustments could be made before sewing the pockets onto the jeans.
Here is also where I ignored the pattern (I know it’s bad to do–well not really). I had made my markings of where the pockets ought to go, but I didn’t use them. They weren’t looking so good to me when I placed them along the markings. Instead I grabbed a pair that she likes (those faithful Levi Strauss) and I measured the distance of the pockets from the center back, and the distance from each upper corner to the angled top stitching. Using the handy wonder tape, I stuck them in place. Double checked that both pockets were symmetrical and stitched them in place. Using the special top stitching thread, of course.
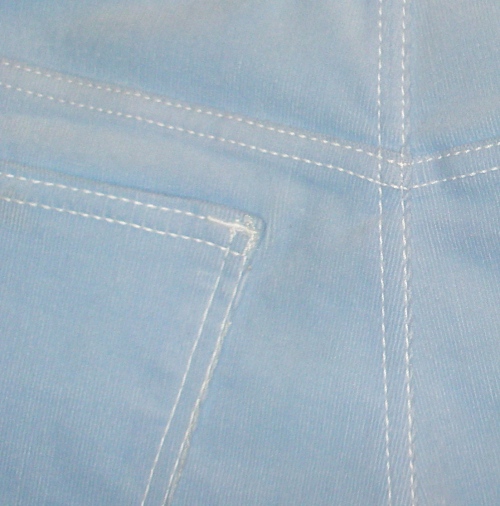
You can add some bar tacks at the upper corners, using regular thread.
Now sew your center back seam. Make sure raw edges are perfectly together or you will mess up your symmetry of pocket placement. Make sure you keep where the upper back pieces intersect together. Use that wonder tape to hold them together. I focused on the top stitching being together, when doing this seam.
Finish raw edges and press toward one side. Okay here is where you need that hammer. To sew top stitching over that extremely bulky section along the center back, first pound it with a hammer (not very hard and just a few times will do). I use a dish towel to protect the fabric when I hammer that bulkiness.
Carefully top stitch center back. Oh, and make sure you are using a heavy duty needle if you weren’t already: a 16 or 18 depending on your fabric.
The 2nd part of the 3 part construction method is done. Some cool jeans are well on their way 🙂
You must be logged in to post a comment.