An Extensive Gathering Tutorial

How to sew perfect gathers.
Here is my gathering tutorial for how to make great gathers. Gathers are where many little girl skirts and dresses get their twirl and puffy sleeves get their puff. This tutorial will demonstrate how to sew together a gathered piece of fabric to a piece of fabric that is not gathered. There are many other ways to gather and attach gathered fabric to another piece of fabric. This tutorial shows the method that I prefer and techniques that work for me.
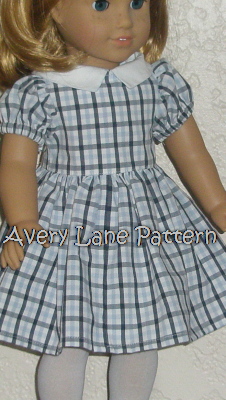
General Instructions:
Make gathering stitches along the edge of the piece of fabric that will be gathered. To form gathering stitches, sew two parallel lines of stitches close to the edge that will be gathered, between the markings on pattern if given. Do not sew too close to edge or fabric will fold and gathering may not work properly.
Determine the seam allowance (where the seam will be sewn) and then sew gathering stitches on both sides of that seam allowance.
For instance, most of what I sew has a 3/8 seam allowance, so I would sew gathering stitches ¼” and ½” from raw edge. (Tip: 3 rows of gathering stitches will make even better gathers, or help with thicker fabrics)
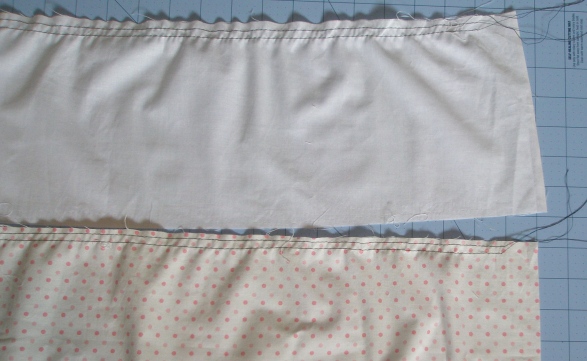
Once you’ve made your gathering stitches, just pull on both bobbin threads at the same time to gather. Pull until the fabric is gathered to fit and then smooth out gathers evenly. Pin in place and sew as directed in instructions.
Gathering stitches can easily be removed with a seam ripper once garment is finished, so don’t worry if your gathering stitches are outside the seam allowance and show on the outside of the garment. Simply use a seam ripper to remove any gathering stitches from the outside of your garment, and trim threads close to fabric. Most often, once you’ve loosened and pulled several stitches, the gathering stitches come out easily by pulling on the thread. With this method, one row of gathering stitches will be showing and consequently removed after gathered fabric is sewn to non-gathered fabric, such as a bodice.
I will expand here on specific applications: the sleeve and the skirt in garments, as they are common places in which fabric is gathered for patterns and designs.
Gathered Sleeve:
The first step is to determine the center of the sleeve, so that it can be lined up with the shoulder seam, and subsequently gathers can be evenly distributed on either side of the center.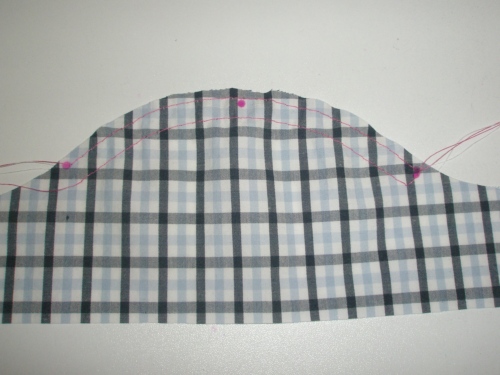
Many patterns will have this marked for you. If not, then fold sleeve in half and mark with a fabric marker. Pin sleeve center to shoulder seam, right sides together. Pin the ends of sleeve in place. Picture below shows that I have pinned my sleeve in three places: center at shoulder seam and the ends. This important, because once gathered, it is hard to know where the mid way point is.
Now pull on the bobbin threads until the sleeve fits the opening. 
With your thumb on one side and forefinger on the other side, slide the gathers to spread them more evenly. The gathers should move and slide easily as you loosely hold them as shown below.
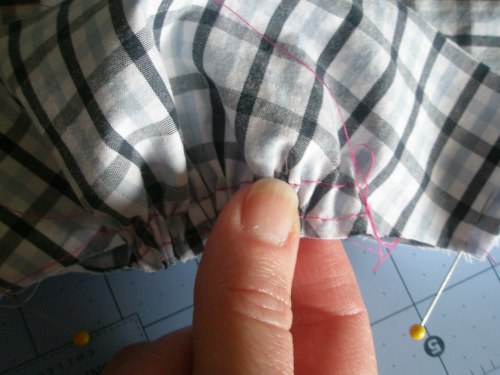
Once spread evenly, pin them in place, making sure to keep raw edges together. I use a lot of pins. It is best to stop and remove pins before sewing over them, which also prevents your sewing from going wonky or off course. If you sew slow enough, you can sew right up to the pins and remove them before they go under the needle.
If you do hit a needle, it could break and either hurt you or your machine—this is why it is not a good thing to do. So if you do sew over pins, then go extremely slowly and cautiously. In addition, if you do hit a pin, you will need to change your needle. I use a somewhat short stitch length (2.5 or 3 on my machine) and use my left hand to hold the gathers in place as I sew. See Notes below for photo of what I mean.

Notice the orange thread is sewn along the 3/8 inch seam allowance and is sewn down the middle of the gathering stitches, shown in the pink thread.
After the pins are removed, the gathering stitches are easily removed as well, by pulling on the bobbin threads until all the way out or using a seam ripper.
Gathered Skirt attached bodice of a dress: (or use the same ideas for attaching to waistband)
The bodice usually has side seams, but you may need to mark the center front of bodice, and center back of bodice, before beginning.
You will most likely be sewing the skirt in the round, so mark the skirt piece in 4 equal sections. If the skirt piece has side seams, then these will be two marks, and half way between them for your remaining marks. If not, as example shows, then fold in half and then in half again to mark your quarter points. Use a fabric pen to mark skirt piece’s quarter points.
Pin the skirt to bodice (right sides together). If you have side seams in skirt, then match them with the side seams in bodice. If not, the match the marks. If working in the round and you have only one seam in your skirt piece, it’s usually best to pin this to the center back mark.
Please note: My example is sewn in the flat and the center back is completely open.
Now pull on the bobbin threads until the fabric piece that is to be gathered fits the bodice. Pull both threads together and evenly for best results. Using thumb on one side and forefinger on the other side, slide the gathers over and through to each section. Once the gathered fabric is the same length as the bodice, then make sure each section has enough gathers to fit that section. In other words, within each section, the un-gathered piece lies flat and the gathered piece fits that section.
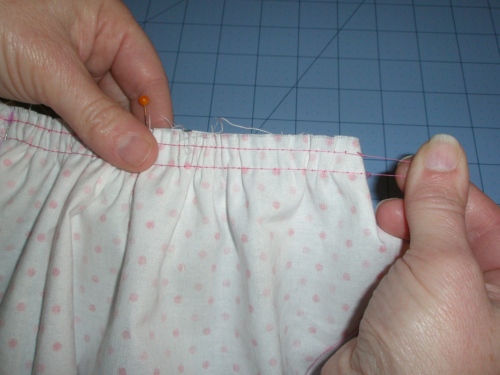

Now spread the gathers evenly within each section and pin in place, making sure to keep raw edges together. I like to use lots of pins to help prevent the gathers from moving and shifting, while I sew them in place. See sleeve tutorial above for more info on pins and sewing.
Tip: Reduce the presser foot pressure to prevent the gathers from being pushed while sewing the 2 pieces together.
Sew together on the seam allowance (shown in blue thread), right between the gathering stitches. Remove gathering stitches, by pulling on bobbin threads until all the way out or use a seam ripper.
A few additional notes:
Pulling on the needle threads of your gathering stitches will also work, but the bobbin threads pull more easily.
Once you have pulled gathering stitches and gathered fabric fits the area to be sewn to, you can secure the threads before spreading the gathers out evenly.
I like to tie the bobbin threads into bows, as shown below.
Another method is to wrap the bobbin threads around a pin at the edge of gathering stitches. This allows you to spread your gathers and gather close to the tied thread or the wrapped pin, without losing your gathers.
While sewing my gathered fabric to the non-gathered fabric, such as a sleeve or skirt, I hold the gathered fabric firmly, to prevent shifting and to prevent the presser foot from flattening my gathers, as shown below. Make sure to tuck your thumb up against your hand, and out of the path of the presser foot, to prevent injury.Reducing the presser foot pressure will also help prevent the gathers from shifting.
[NOTE: I don’t sew over pins and never allow students to. This is a staged photo and now I realize that it looks as if I’ve sewn over some pins. To keep the gathers from shifting, I keep the pins in as long as possible without sewing over them. Most often, I sew right up to a pin and remove it at the last possible moment.]
Of course there are many other methods, and I have tried many of them. This is my tried and true method for lovely gathers.
I do not like using my ruffler, because it makes teeny tiny pleats, not soft gathers. With this method, I can make perfect, soft gathers. When making a twirl skirt or tiered skirt and submit to my serger or ruffler foot (because it’s faster), I always regret it. I have never regretted using this method. I hope you enjoy using some or all of the techniques described in my tutorial. I’d love to hear how it worked for you, or if you have any questions, please post below 🙂
Happy Twirling!
~Erin


You must be logged in to post a comment.